In blog Setup VM for DB2, we went through step by step process to setup a Linux VM hosted on Oracle Virtual Box. After setting up your VM, you might be in a situation where you want to create a new File System or drive, extend size of existing File System or drive, but this can be done only if you have free space available on your VM. If all existing storage is allocated for file system or drive then to create new File System or drive you would need additional storage. In this blog we will go through step by step process to add additional storage to your Oracle Virtual Box VM and then utilize additional storage to create a new File System in RHEL.
Add additional Storage to VM hosted on Oracle Virtual Box
Before addition of additional storage to your VM, you should ensure that your VM is in Powered Off state. If it is in running State then Right Click on Your VM, Select Close and then Select Power Off to Power Off your VM. You can also use your VM OS shutdown method to gracefully Power Off your VM.
Once your VM is in Powered Off state, select your VM and click on Settings button.
After clicking on Settings button you will get below screen.
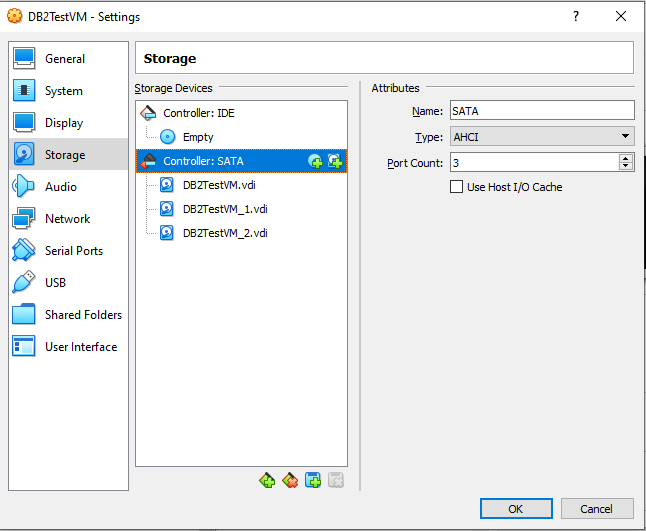
In Settings screen, click on Storage icon, select Controller: SATA and click on Add hard disk icon.
On clicking Adds hard disk icon you will get below screen.
Click on Create icon to create a new Hard disk. Create Virtual Hard Disk wizard will open.
Select VDI (VirtualBox Disk Image) and click on Next button.
Select Dynamically allocated and click on Next button.
Update location of new Virtual Hard Disk file and size of Virtual Hard Disk. Click on Create button to create new Virtual Hard Disk.
Once new Virtual Hard Disk gets created it will be available under Not Attached section. Select Virtual Hard Disk and click on Choose button. This will add new Virtual Hard Disk to your VM.
Click on OK button to close Settings screen. Start your VM by selecting your VM and clicking on Start Icon.
Creating File System on new Hard Disk added to Virtual Machine in RHEL
We can create new File System using both GUI method or command method. We will go through both method in this blog.
Command method to create new File System on new Hard Disk
Check current File System using df -h command.
List available Hard disk mapped to VM using ls /dev/sd* command
We found new device /dev/sdc. Before adding new Virtual Hard Disk you can capture output of ls /dev/sd* to identify new device.
Create new file system on /dev/sdc using mkfs.ext4 /dev/sdc command.
To mount newly created File System, directory should be available. Use below commands to create new directory and mount /dev/sdc.
mkdir /data2
mount /dev/sdc /data2
In above command replace /data2 with new FileSystem name of your choice.
This mount is temporary and it will not automatically mount after server reboot. To make it permanent we need to make an entry in /etc/fstab file, but before that we need to get UUID of /dev/sdc. To get UUDI run command blkid.
Identify UUDI for /dev/sdc from above output and use it in below command. Add below entry in /etc/fstab
/dev/disk/by-uuid/b868fab2-70b1-48d6-a2d7-83cddcb8b013 /data2 auto defaults 0 0
In above command replace b868fab2-70b1-48d6-a2d7-83cddcb8b013 with UUDI which you got from blkid command. Replace /data2 with new FileSystem name decided in above step.
Use mount -a command to mount all file system listed in /etc/fstab if not already mounted. Use df -h command to verify new file system got mounted.
GUI method to create new File System on new Hard Disk
Logging as privileged user. Click on Activities, left icon list click on Show applications and then click on Utilities.
Click on Disks
After clicking on disk below screen will open.
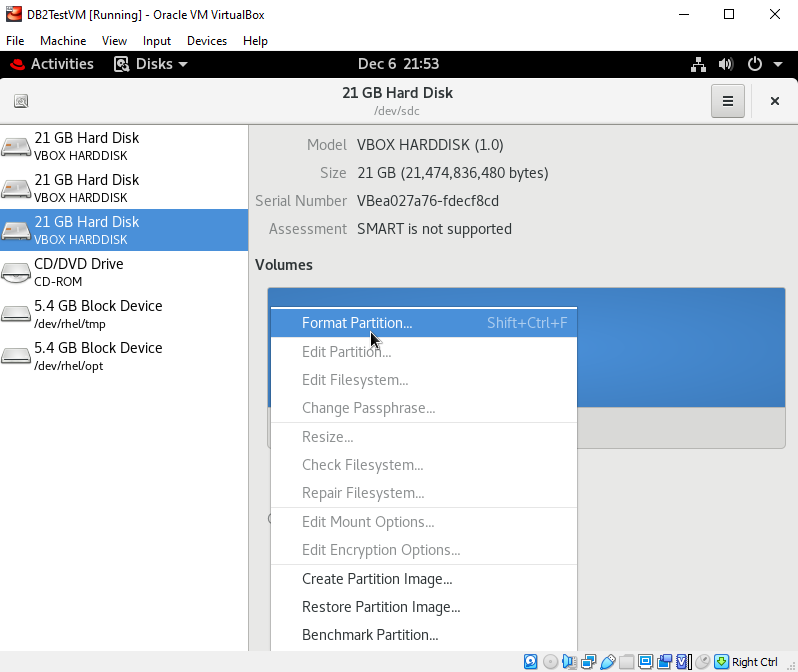
Select New Hard Disk and click on Additional partition options icon to create new File System and mount it.
Click on Format Partition...
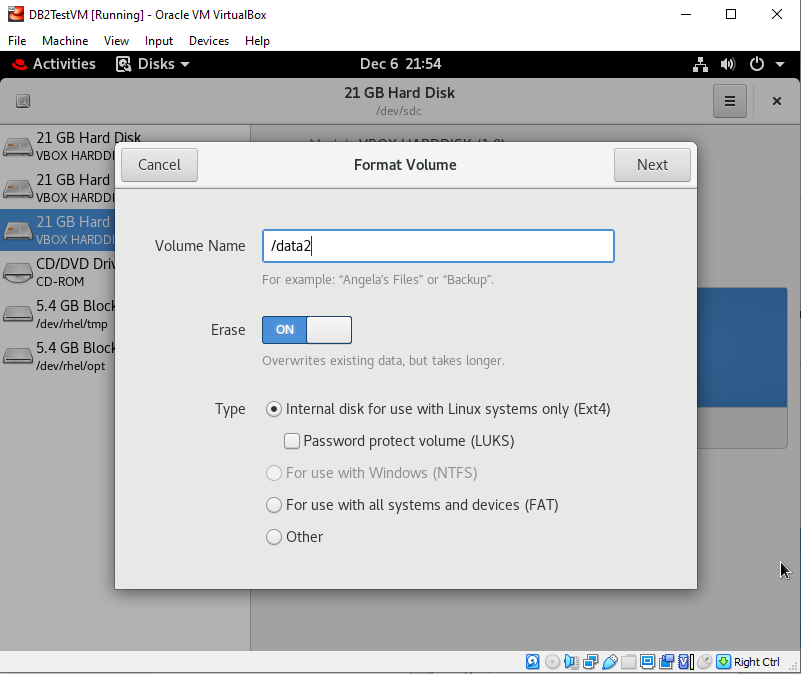
Update Volume Name with new Volume Name, enable Erase option and select Internal disk for use with Linux systems only (Ext4). Click on Next button.
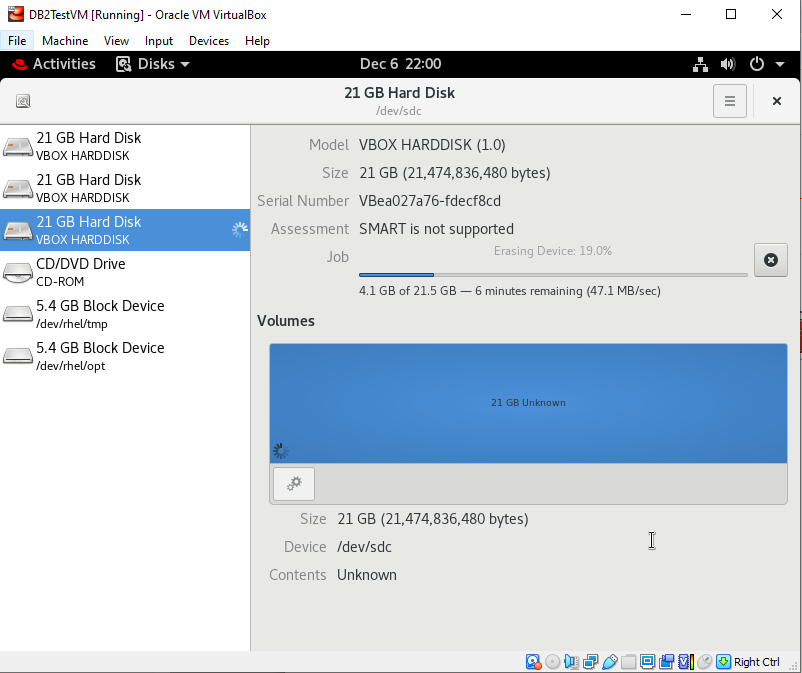
Click on Format button. It will start formatting of disk, it may take a while depending upon hard disk size.
Once formatting completes, click on Additional Partitioning Options icon. Click on Edit Mount Options...
Below screen will open. Click on User Session Defaults to disable it. Check Mount at system startup. Change mount option to defaults. Change Mount Point to name of your choice. Let Identify As default value. Click on OK button.
Click on Mount selected partition to mount your newly created file system and start using it.


Excellent information.
ReplyDelete